1. Getting Started
Installing EMX
Download the emx-theme.zip file from themeforest.net and unzip it.
-
WordPress Theme Manager
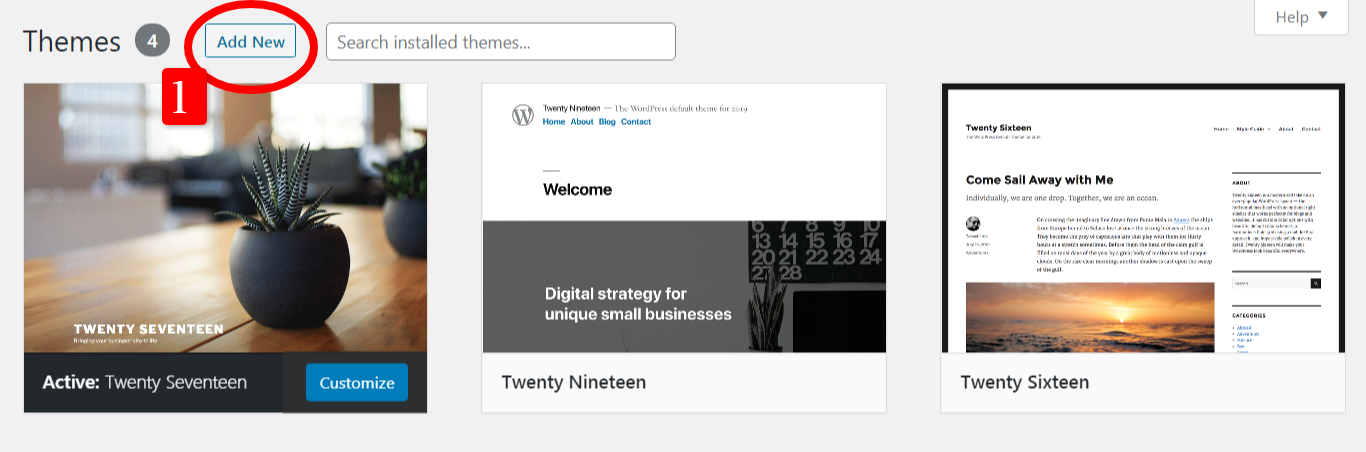
- Login to WordPress admin
- Go to admin panel > Appearance > Themes > Add New > Upload Theme
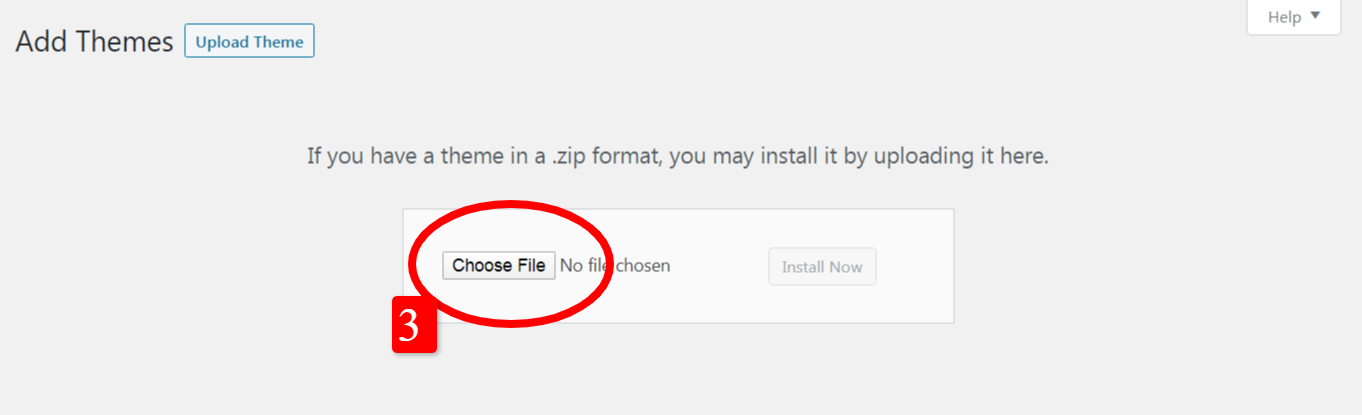
- Click on "Choose File" and select emx.zip
- Click on "Install Now"
- After the theme is installed click on "Activate"
-
FTP upload
- Using FTP client, login to the server where your WordPress website is hosted
- Using FTP client, navigate to the /wp-content/themes/ directory under your WordPress website's root directory
- Using FTP client, upload the Emx directory to themes directory on remote server

Importing Demo Content
If you use the 1 Click Demo Install option, you don`t need to use .xml files, please follow these steps:
- Login to your WordPress admin panel
- Navigate to Appearance > Import Demo Data
- From the Import dropdown menu.
-
From the Import Type select options, select what type of content you'd like to import:
- Content -This will contain all of your posts, pages, comments, custom fields, terms, navigation menus and custom posts.
- Attachments -Download all attachments from the demo may take a while. Please be patient.
- Theme Options - imports settings in EMX Core Options only. This option is recommended for users who would like to achieve the same look and feel of their chosen demo site, but do not want to import any additional content.
- Widgets - imports only widgets. This option is recommended for users who would only like to populate the theme’s widget areas with the widgets from their chosen demo. No other content is imported.
- Sliders - imports only Sliders.
- Click on the Import demo data button and wait for the import process to finish.
Updating EMX
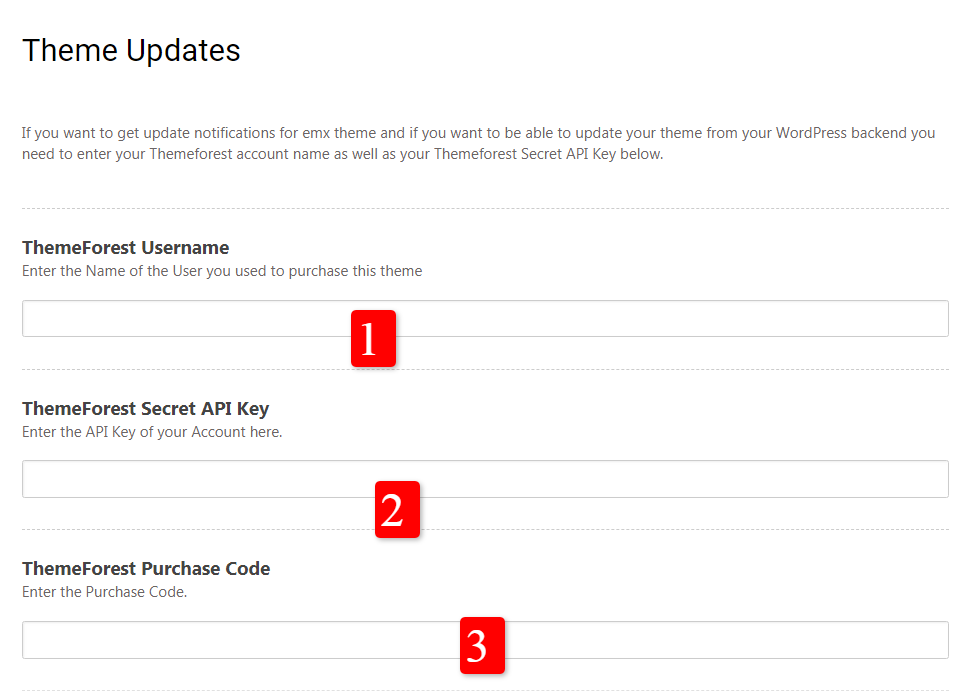
To get update notifications for Emx Theme
- Navigate to Appearance > Theme Options > Theme Updates
- ThemeForest Username: Enter the Name of the User you used to purchase this theme.
- ThemeForest Secret API Key: Enter the API Key of your Account here.
- ThemeForest Purchase Code: Enter the Purchase Code.
Manual Update
You can update your theme manually by performing the following steps:
- Download the latest theme zip file from ThemeForest
- Extract it and locate emx.zip
- Extract emx.zip and locate the emx folder
- Copy/Replace content of the emx folder to the /wp-content/themes/emx folder of your web site.
2. Required plugins
How to Install and Activate Plugins?
- Navigate to Appearance > Install Plugins.
- Select the plugins you need.
- Choose "Install" from Bulk Actions drop down menu and click on "Apply".
- select the same plugins you need and choose "Activate" from Bulk Actions drop down menu and click on "Apply".
3. Emx Theme Options
To customize General settings navigate to Appearance > Theme Options and you will find the following options.
General
This section allows you to set up general settings for your site that will affect its look and functionality. The Layout Style section has options for site Layout, Default Sidebar & Widget Settings, Header & Footer Custom Codes,and Favicons.
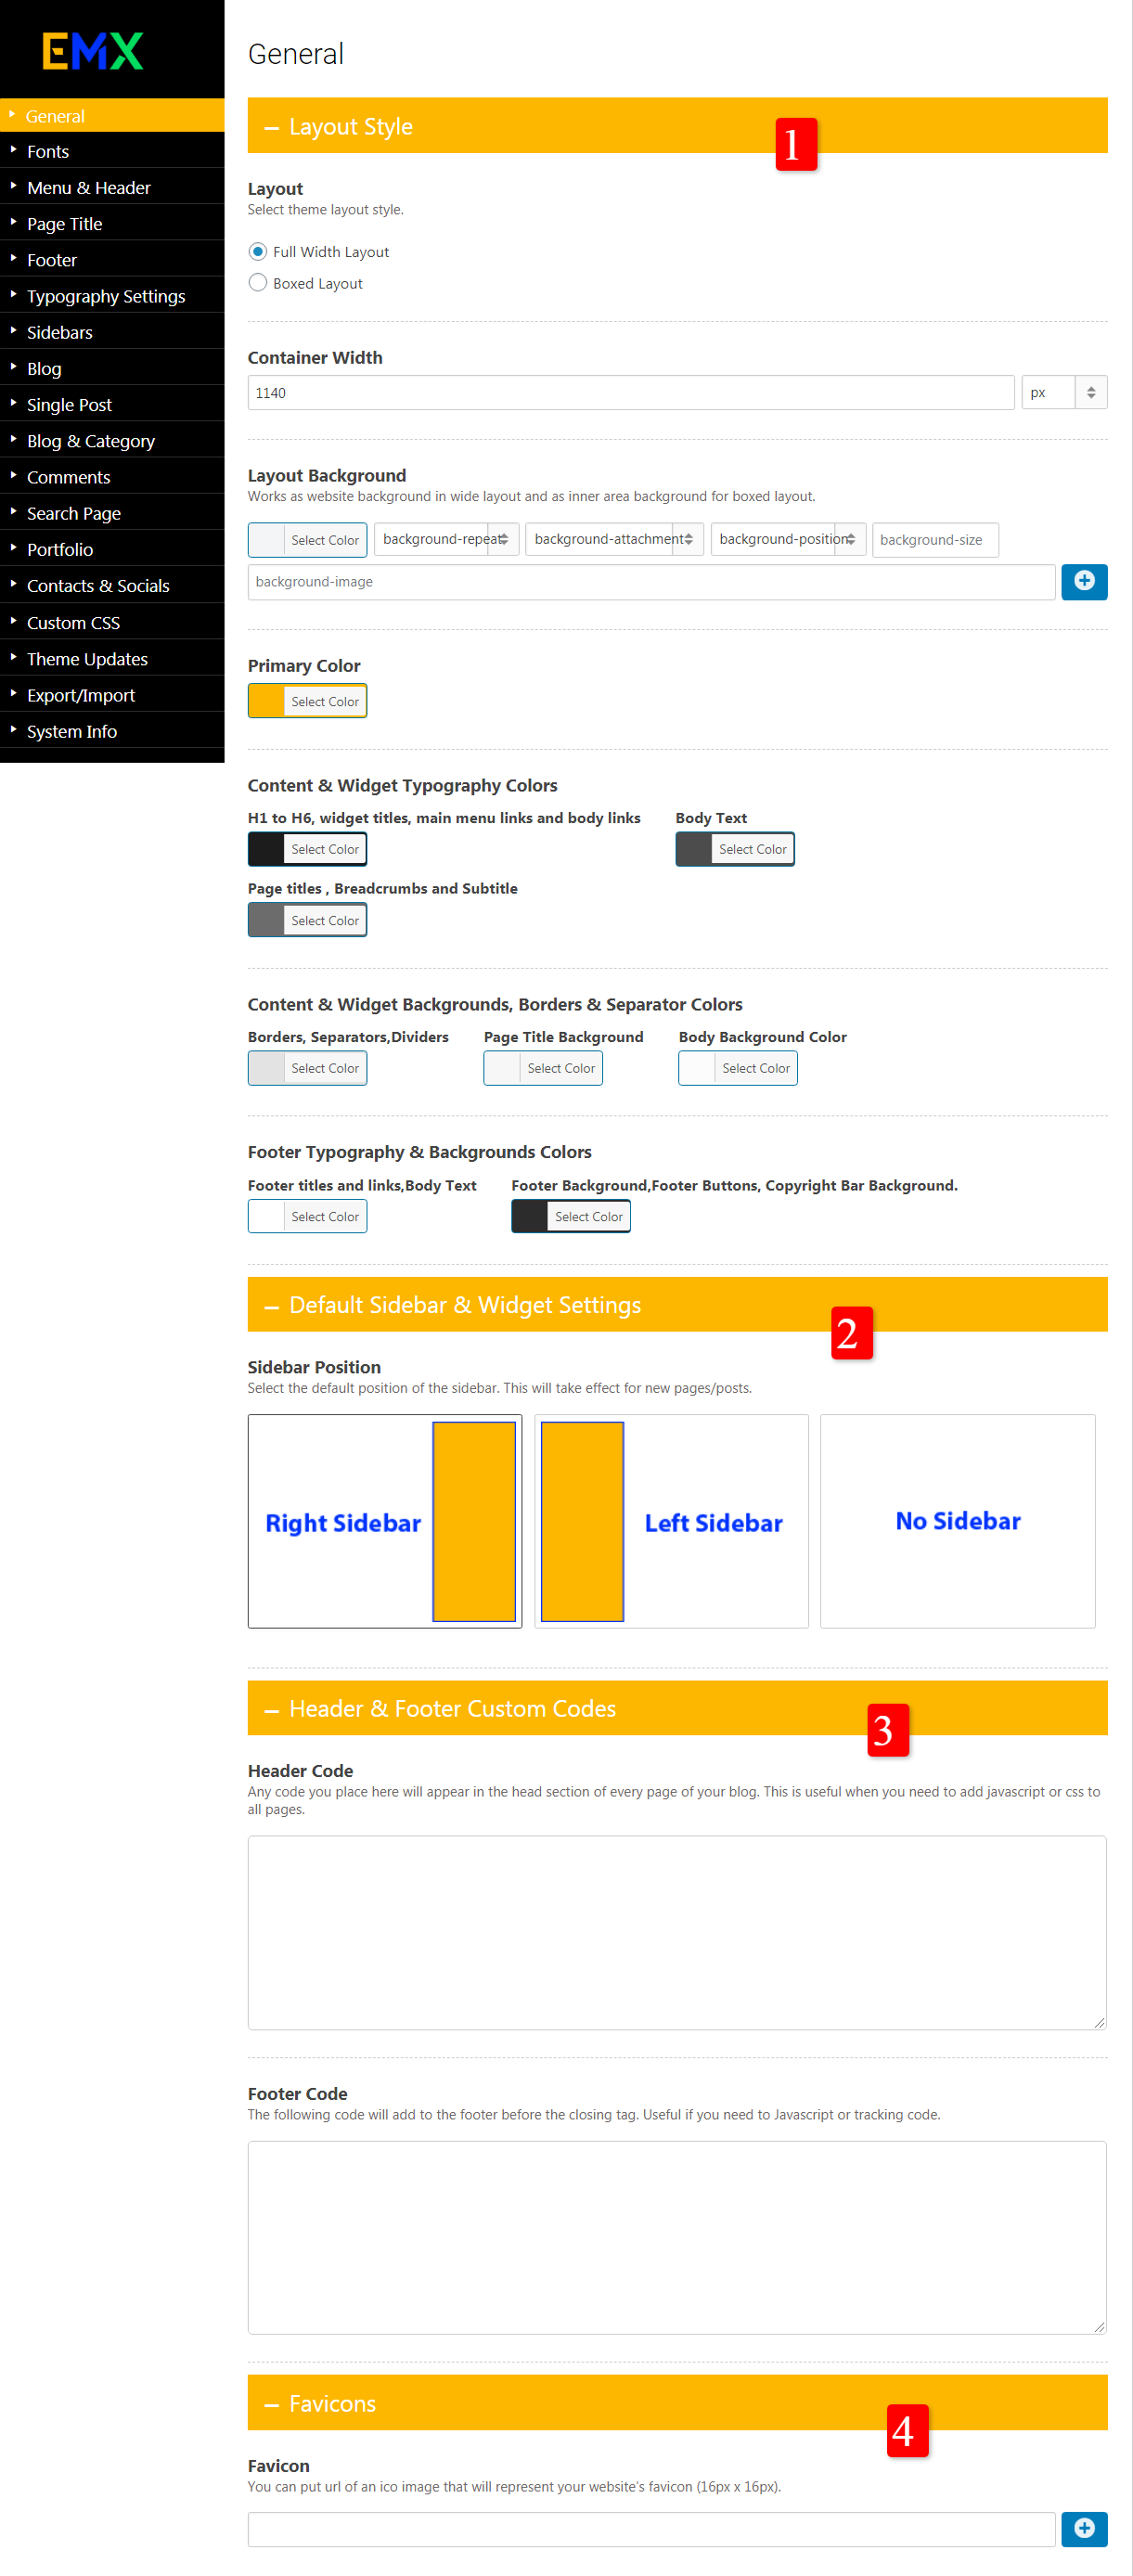
1- Layout Style
- Layout - Select theme layout style "Full Width Layout " or "Boxed Layout "
- Container Width - set a value for container (Website layout) width. You can set a fixed pixel value or percentage of screen width. default value is 1140px..
- Layout Background- Works as website background in wide layout and as inner area background for boxed layout.
- Primary Color - Choose the most dominant theme color.
2- Default Sidebar & Widget Settings
- Sidebar Position - Set the default position of the sidebar. This will be applied on all existing and new pages posts.
3- Header & Footer Custom Codes
- Header Code - Any code you place in head code box will appear in the head section of every page of your website.
- Footer CodeAny code you place in footer code box will be added to the footer before the closing tag.
4- Favicons
- Favicon - Insert your url of an ico image that will represent your website’s favicon (16px x 16px).
Fonts
Add Your Fonts.
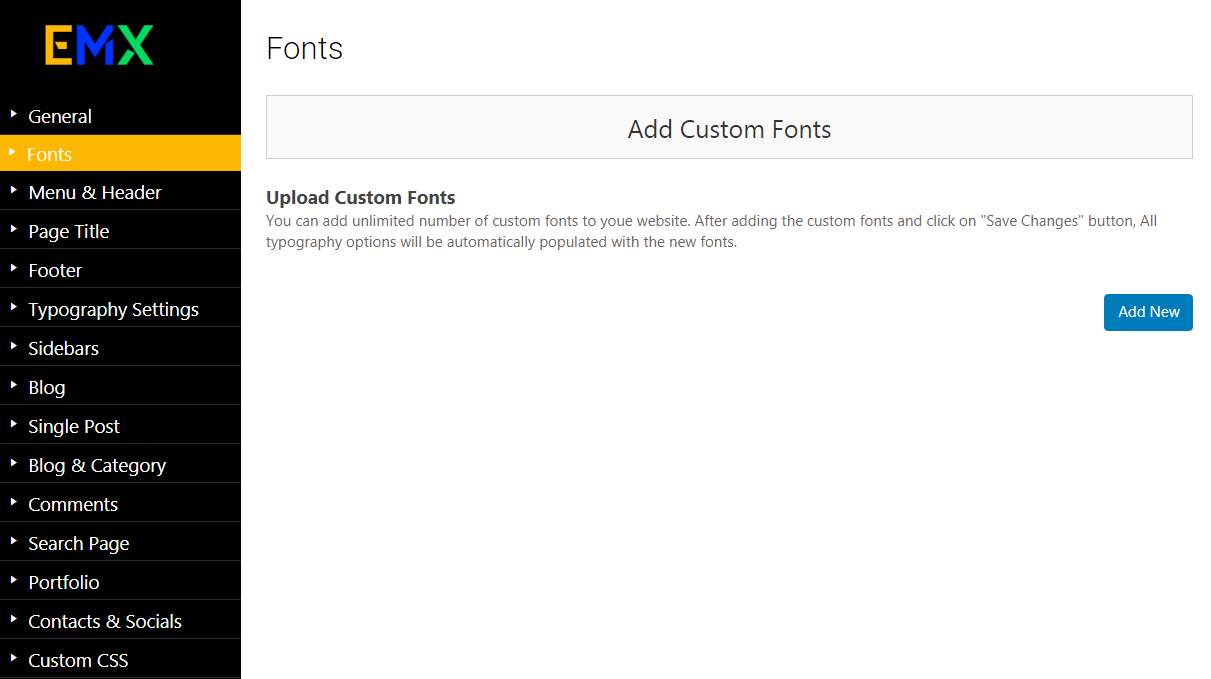
Upload Custom Fonts
You can add unlimited number of custom fonts to youe website. After adding the custom fonts and click on "Save Changes" button, All typography options will be automatically populated with the new fonts..
Menu & Header
This section allows you to set up the header area.

- Navigate to Appearance > Theme Options > Menu & Header
- Header Type: Select header layout you desire from available headers.
- Logo Setting: Choose the logo image file for the retina version of the logo. It should be 2x the size of main logo.
- Header Setting: Select header background image or color. This option is applicable for all headers on homepage and inner pages.
- Main Menu Setting: Select Main menu links font, color and other properties.
- Sticky Header Setting: Turn fixed header while scrolling on or off.
- Top Header Setting:Top header is visible only on header layouts: 1 and 3.
Page Title
This section allows you to set up the title area.
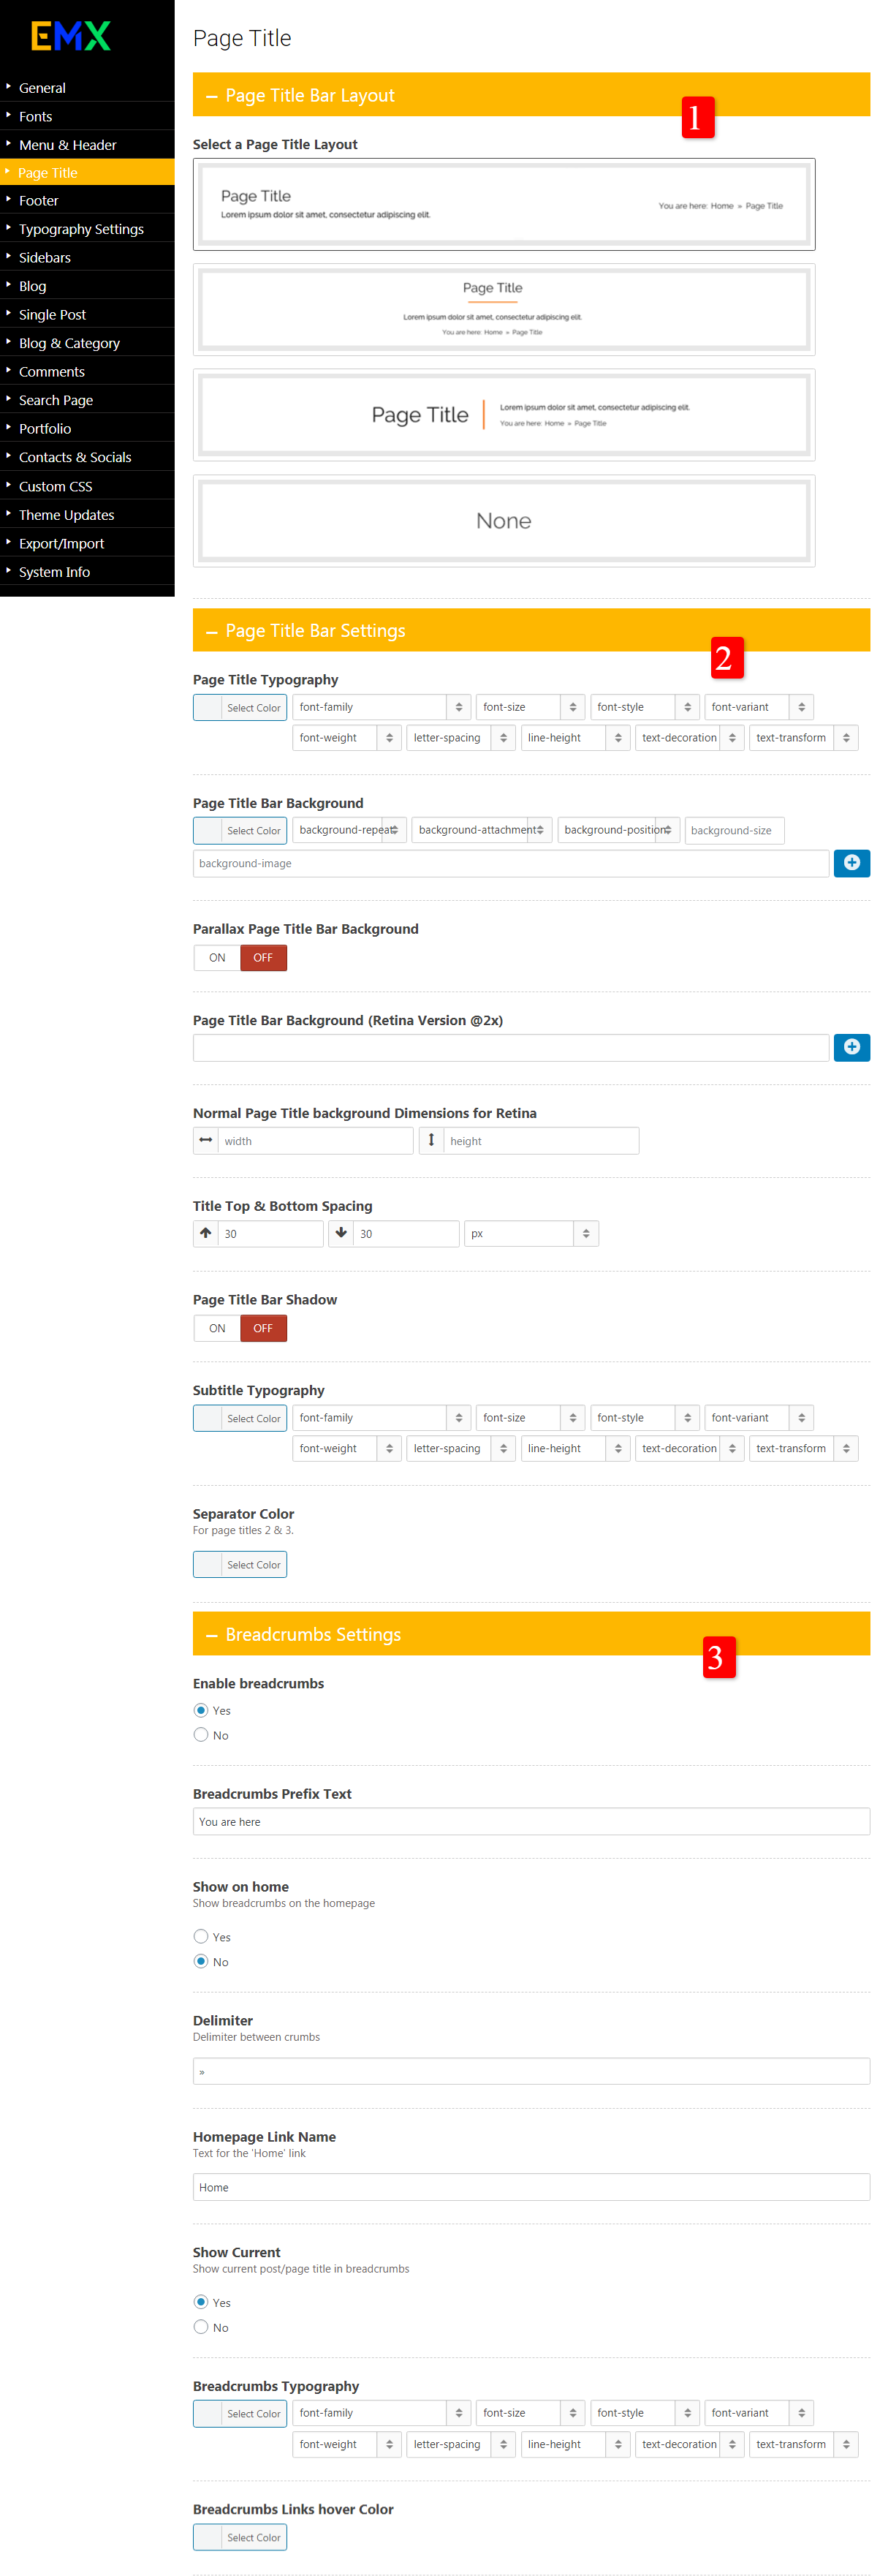
- Navigate to Appearance > Theme Options > Menu & Header
- Page Title Bar Layout: Select the page title bar layout you desire from available layouts.
- Page Title Bar Settings:If you added image background for the page title bar you can turn parallax on or off.
- Breadcrumbs Settings:show or hide breadcrumbs on page title bar.
Footer
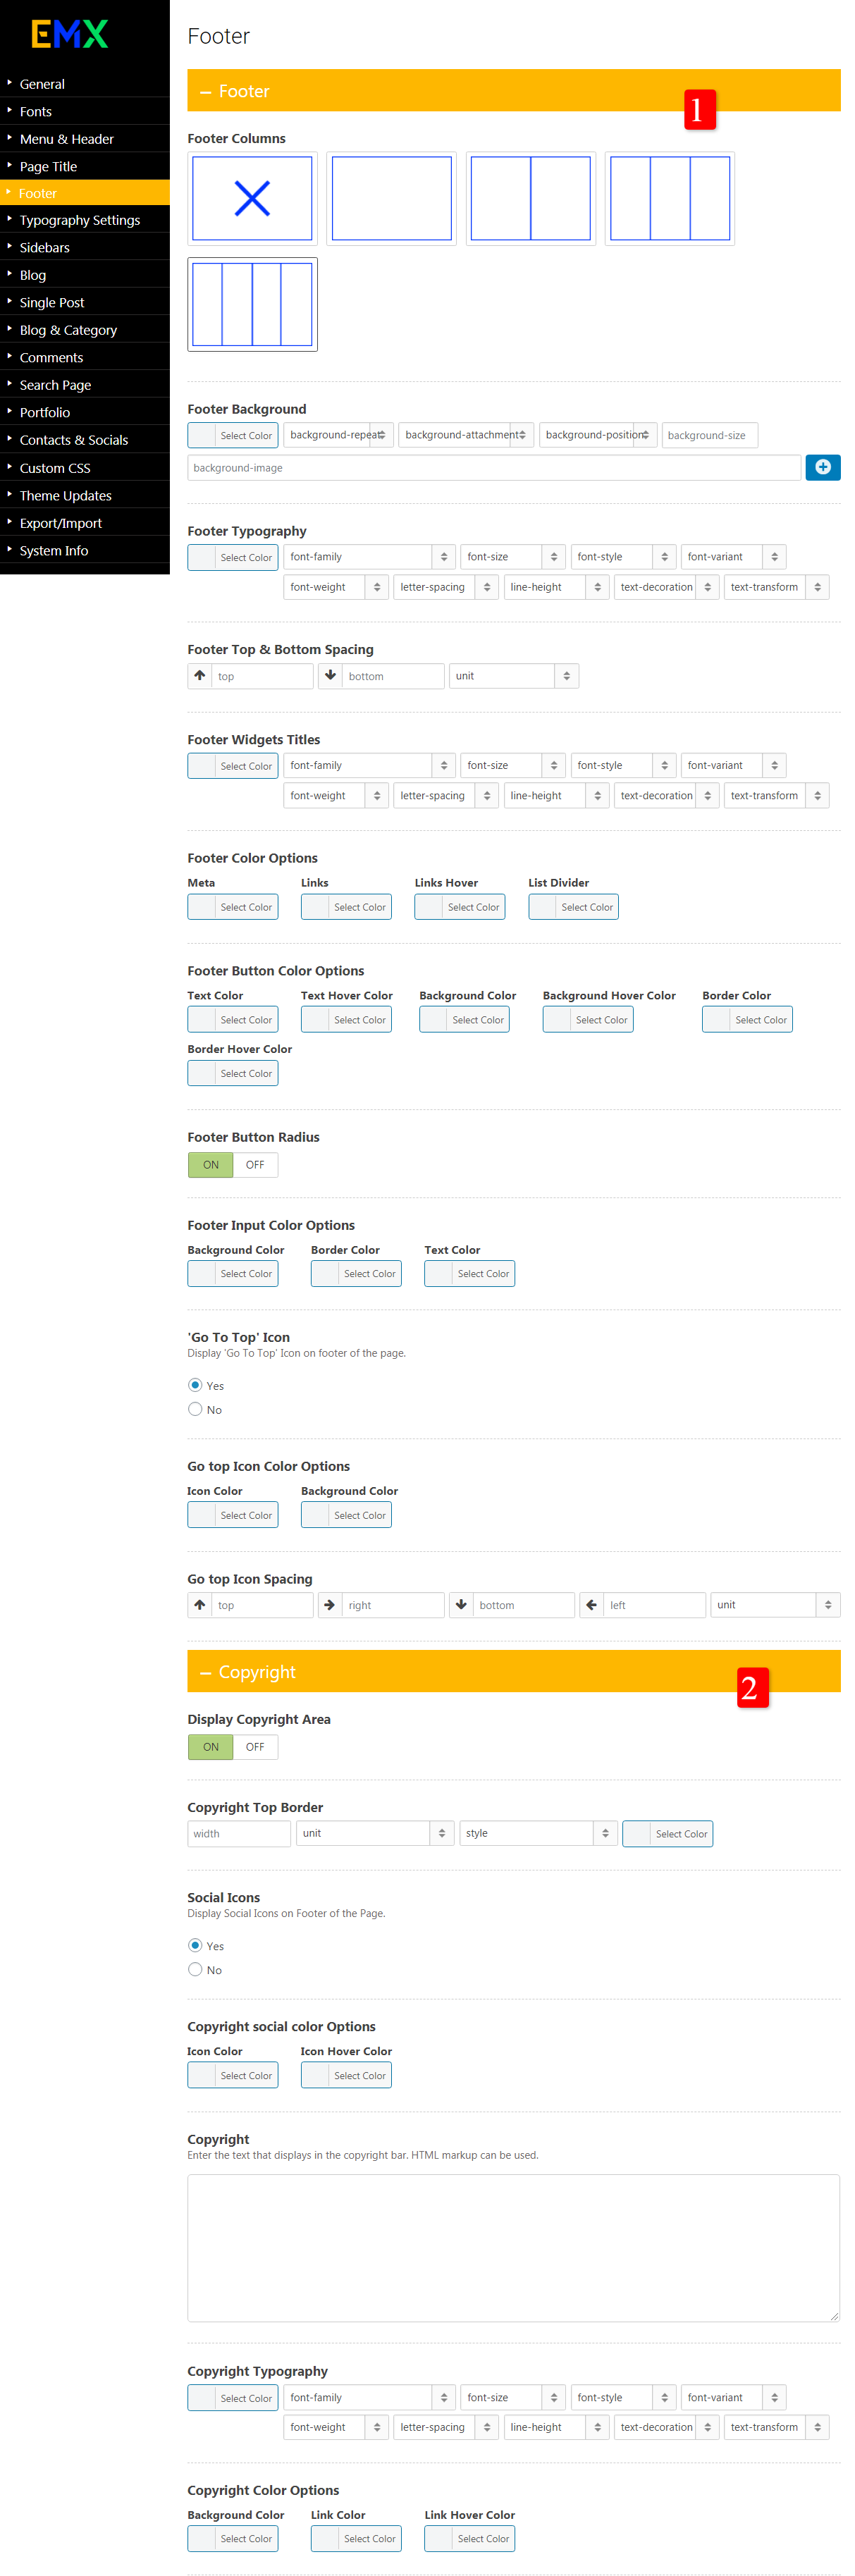
- Navigate to Appearance > Theme Options > Footer
- Footer Layout: Select the Footer layout you desire from available layouts.
- Footer Background:elect Footer background image or color.
- Footer Typography:Select footer text font, color and other properties.
- Footer Top & Bottom Spacing:Select the Footer top and bottom spacing.
- Footer Button Color Options: Select the desired color for Button.
- Display Copyright Area:Turn copyright area on or off.
Typography Settings
This section allows you to set up the title area.
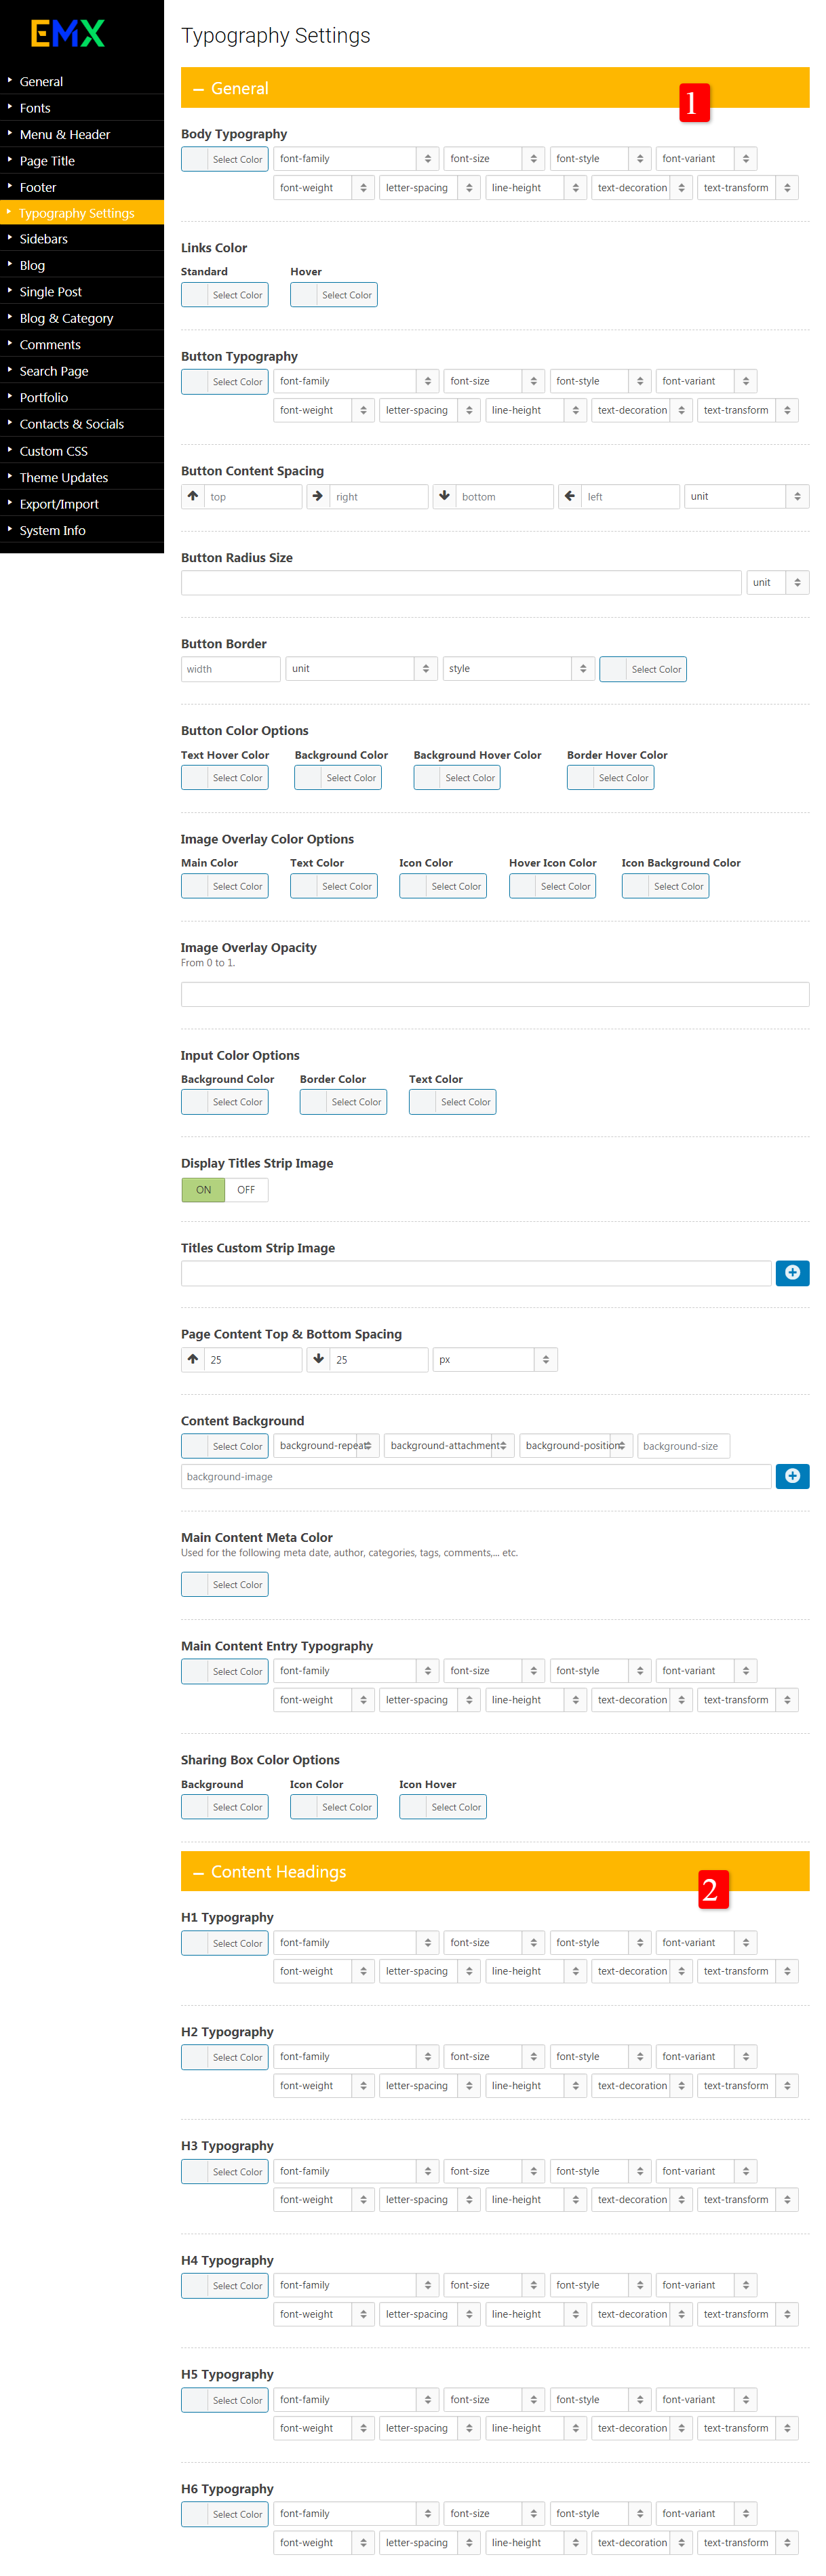
- Navigate to Appearance > Theme Options >Typography Settings
- Page Title Bar Layout: Select the page title bar layout you desire from available layouts.
- Page Title Bar Settings:If you added image background for the page title bar you can turn parallax on or off.
- Breadcrumbs Settings:show or hide breadcrumbs on page title bar.
Sidebars
This section allows you to set up the title area.
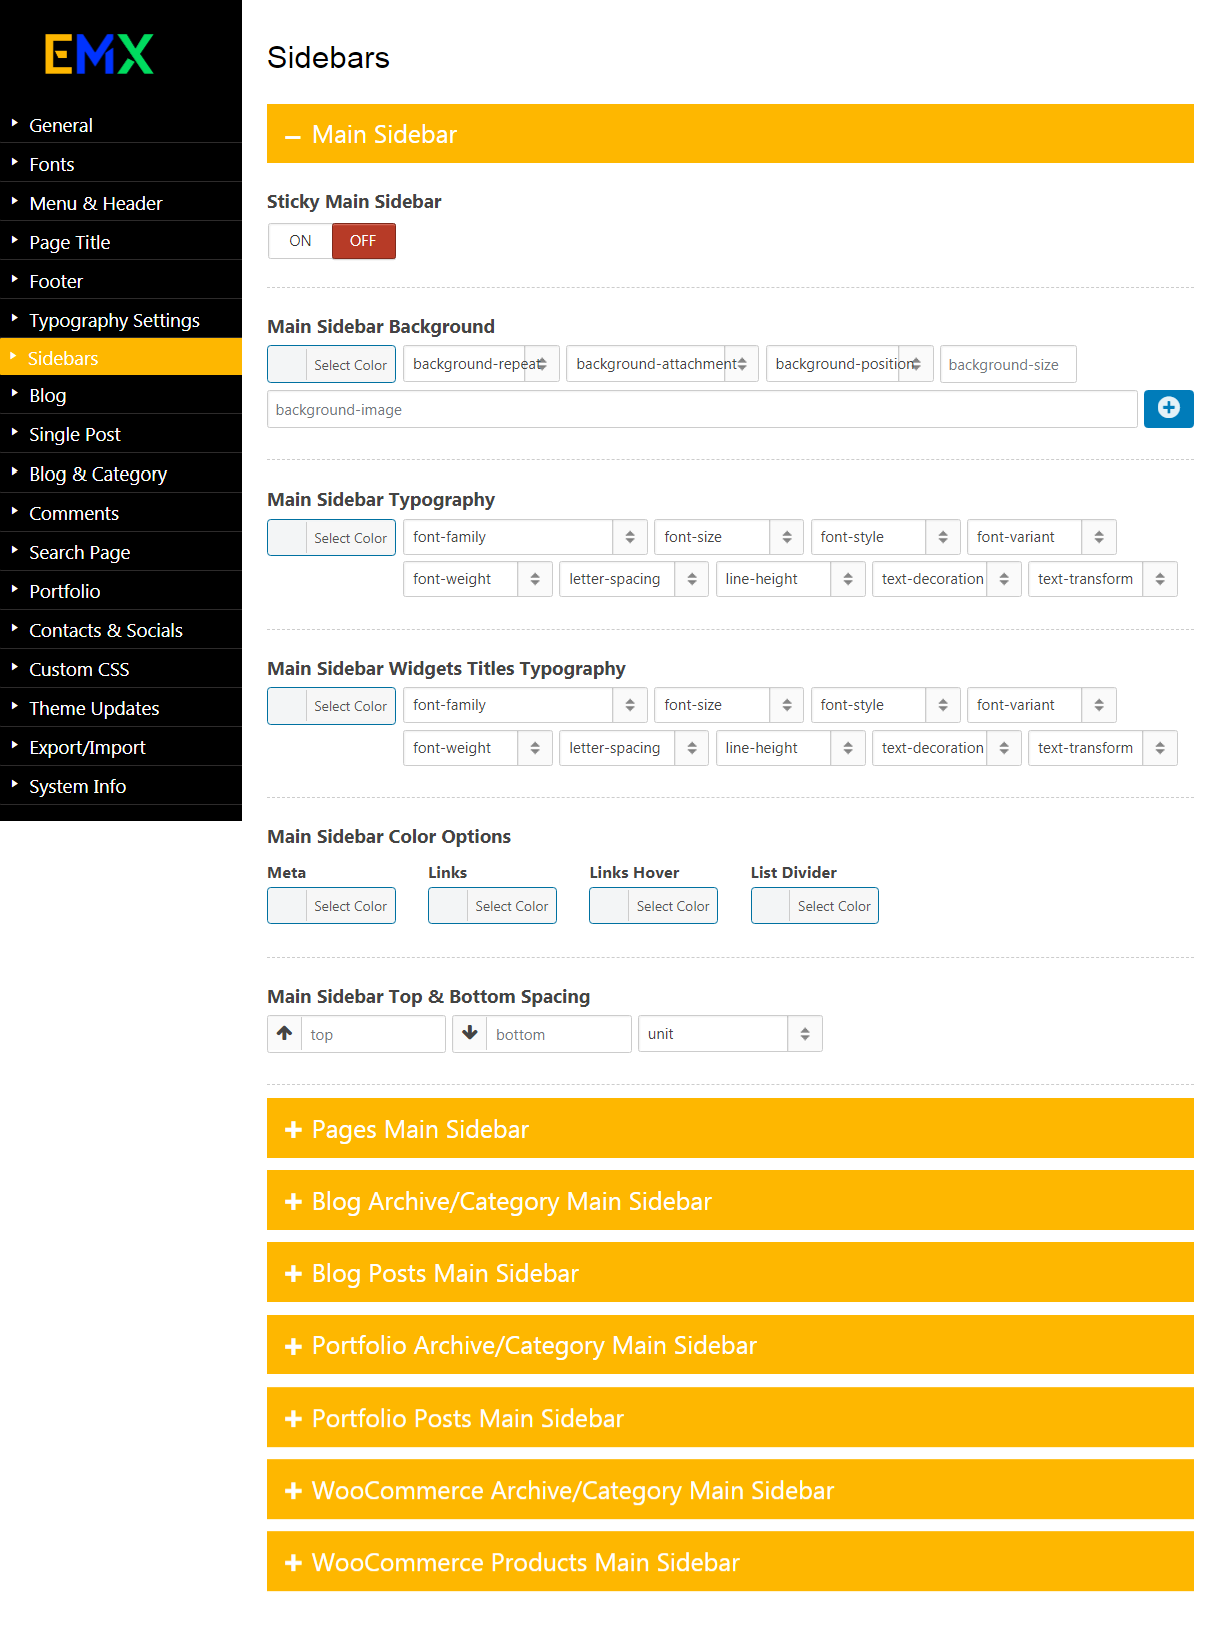
- Navigate to Appearance > Theme Options > Sidebars
- Main Sidebar Background:Select Main Sidebar background image or color.
- Main Sidebar Typography:Select Main Sidebar text font, color and other properties.
- Main Sidebar Widgets Titles Typography:Select Main Sidebar Widgets Titles text font, color and other properties.
Blog

- Navigate to Appearance > Theme Options > Blog
- Blog Page Title:Write the title that will appear on the Blog Page.
- Display Blog Title on Posts:This will display blog title on all posts expect the posts that excluded from blog categories.
- Exclude Categories from Blog:By default the blog displays a list of all of your most recent posts. However, if you would like to exclude certain category from the list you can do so here.
- Blog Layout:Select Blog layout you desire from available Layouts (Grid – Classic – Large – Medium – Post Format).
Single Post
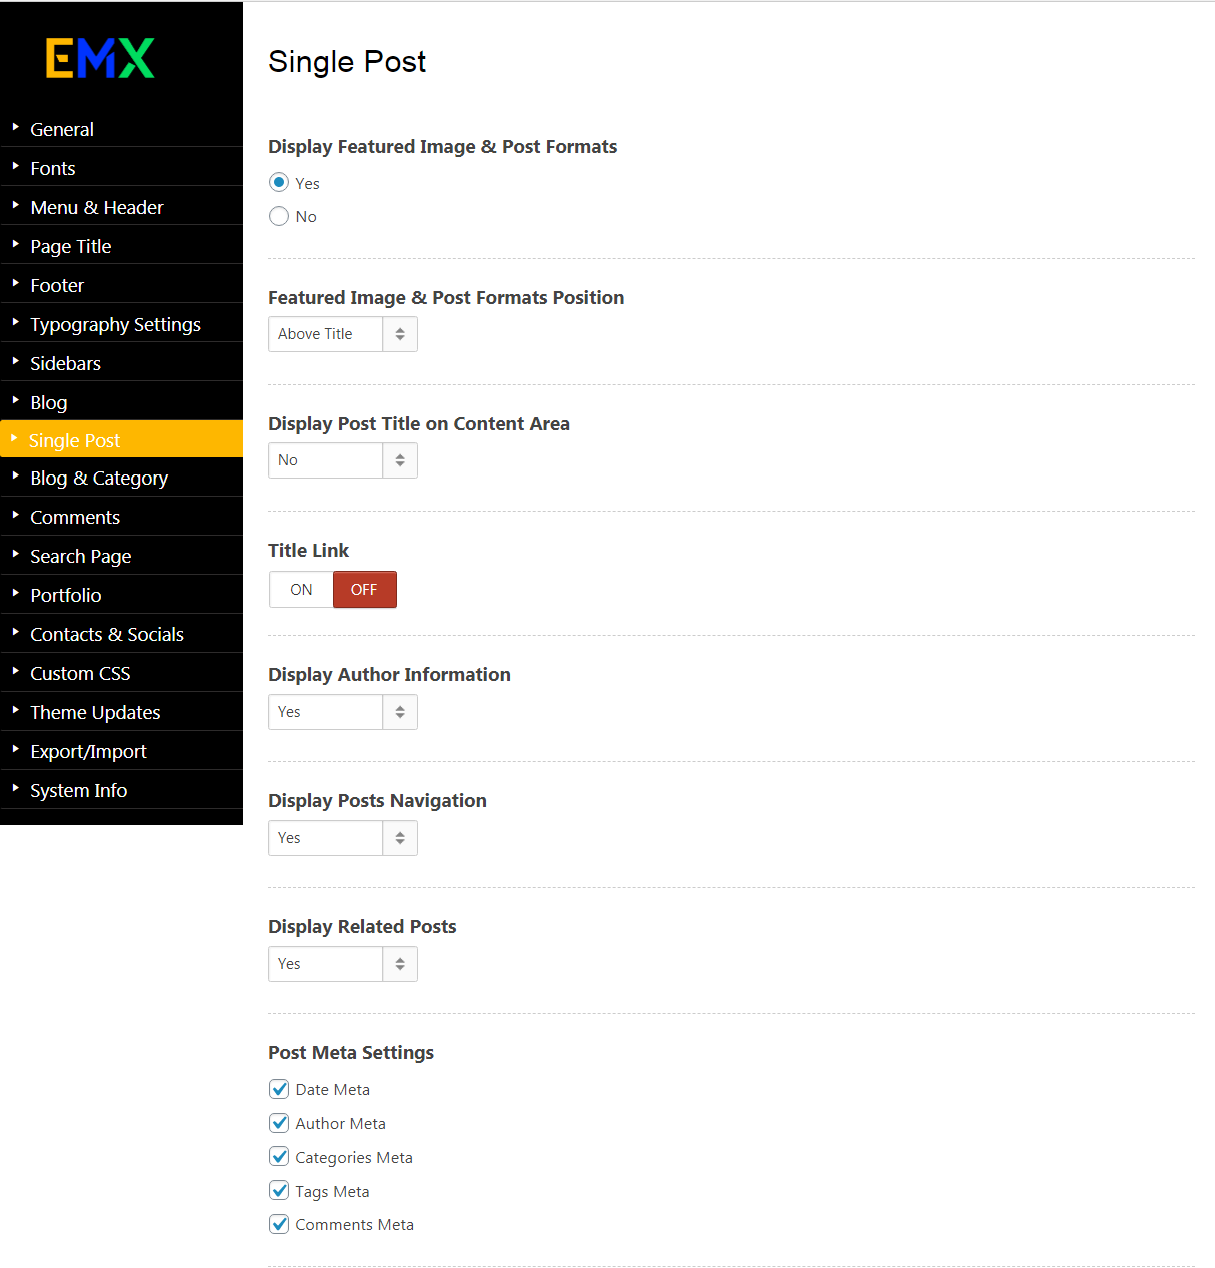
- Navigate to Appearance > Theme Options > Single Post
- Display Featured Image & Post Formats:Show or hide featured image.
- Featured Image & Post Formats Position:Select the desired position for the featured image on the single post, by default the featured image & post formats position are above Title.
- Display Post Title on Content Area:Show or hide post title on the content area.
- Title Link:Turn the Post Title Link on or off on the Single post page.
- Display Author Information:Show or Hide Author Information on the Single post page.
- Display Posts Navigation:Show or Hide posts navigation on the Single post page.
- Display Related Posts:Show or Hide Related Posts on the Single post page.
Blog & Category
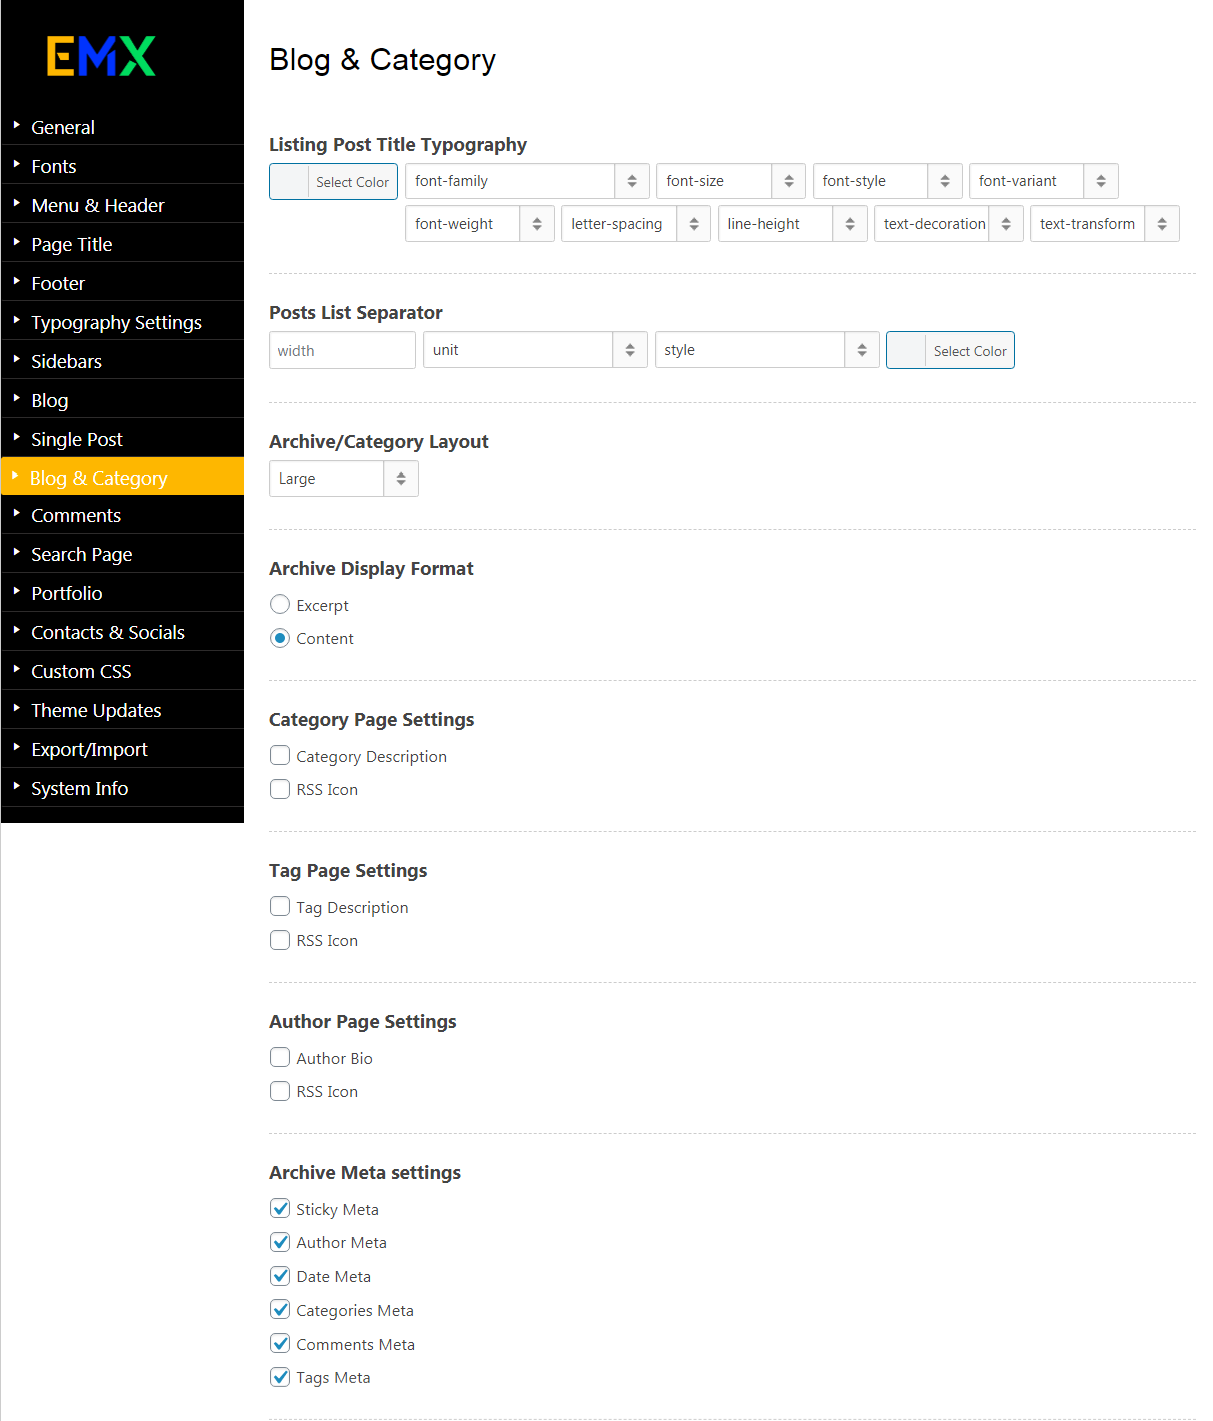
- Navigate to Appearance > Theme Options > Blog & Category
- Listing Post Title Typography:Select post title text font, color and other properties.
- Category Page Settings:Select the Following desired items to display it on Category Pages.
- Tag Page Settings:Select the Following desired items to display it on Tag Page.
- Author Page Settings:Select the Following desired items to display it on Author Page.
- Archive Meta Settings:Select the desired meta to display it on Archive Pages.
Comments
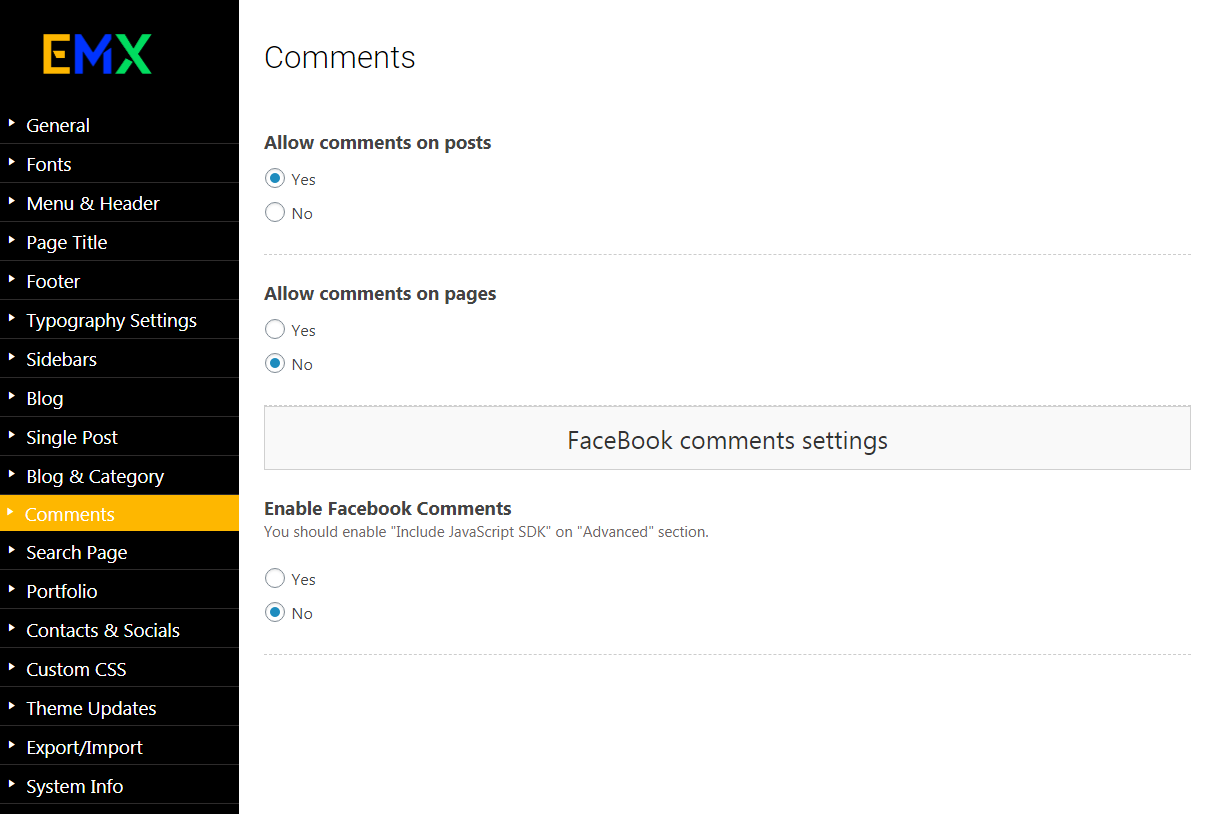
- Navigate to Appearance > Theme Options > Comments
- Allow Comments on posts:Show or hide the comments on the posts.
- Allow Comments on pages:Show or hide the comments on the pages.
- Enable Facebook Comments:Turn Facebook Comments on or off.
Contacts & Socials
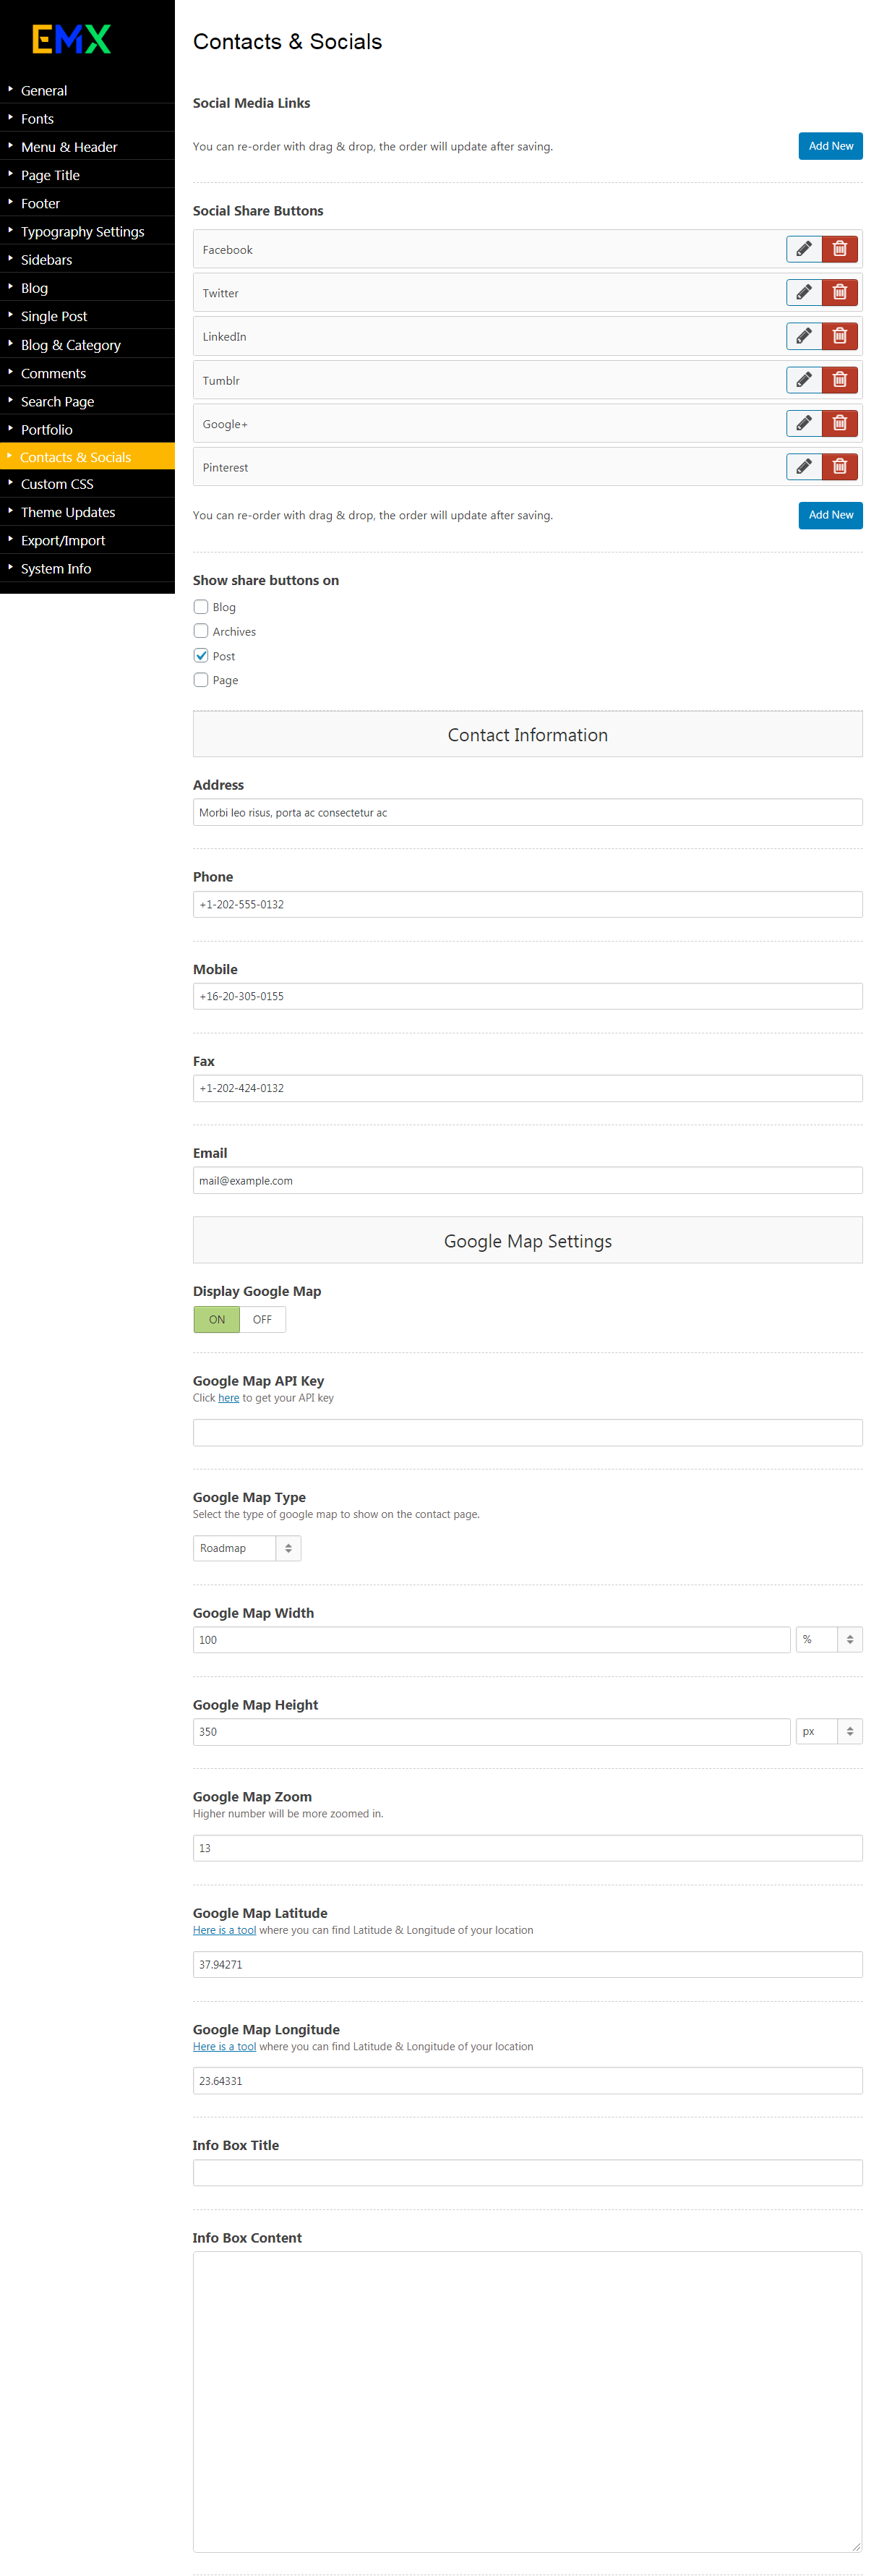
- Navigate to Appearance > Theme Options > Contacts & Socials
- Social Media Links: Insert your custom URLs for each social network . The social media links will appear on the header and on the footer.
- Social Share Buttons:Add the desired social share Buttons.
- Contact Information:Insert your address,Phone,Mobile,Fax and Email that will appear in the contact page on the right side of page as your contact details.
- Display Google Map:Turn Google Map on or off.
- Google Map Type:Select the type of google map to show on the contact page.
Custom CSS
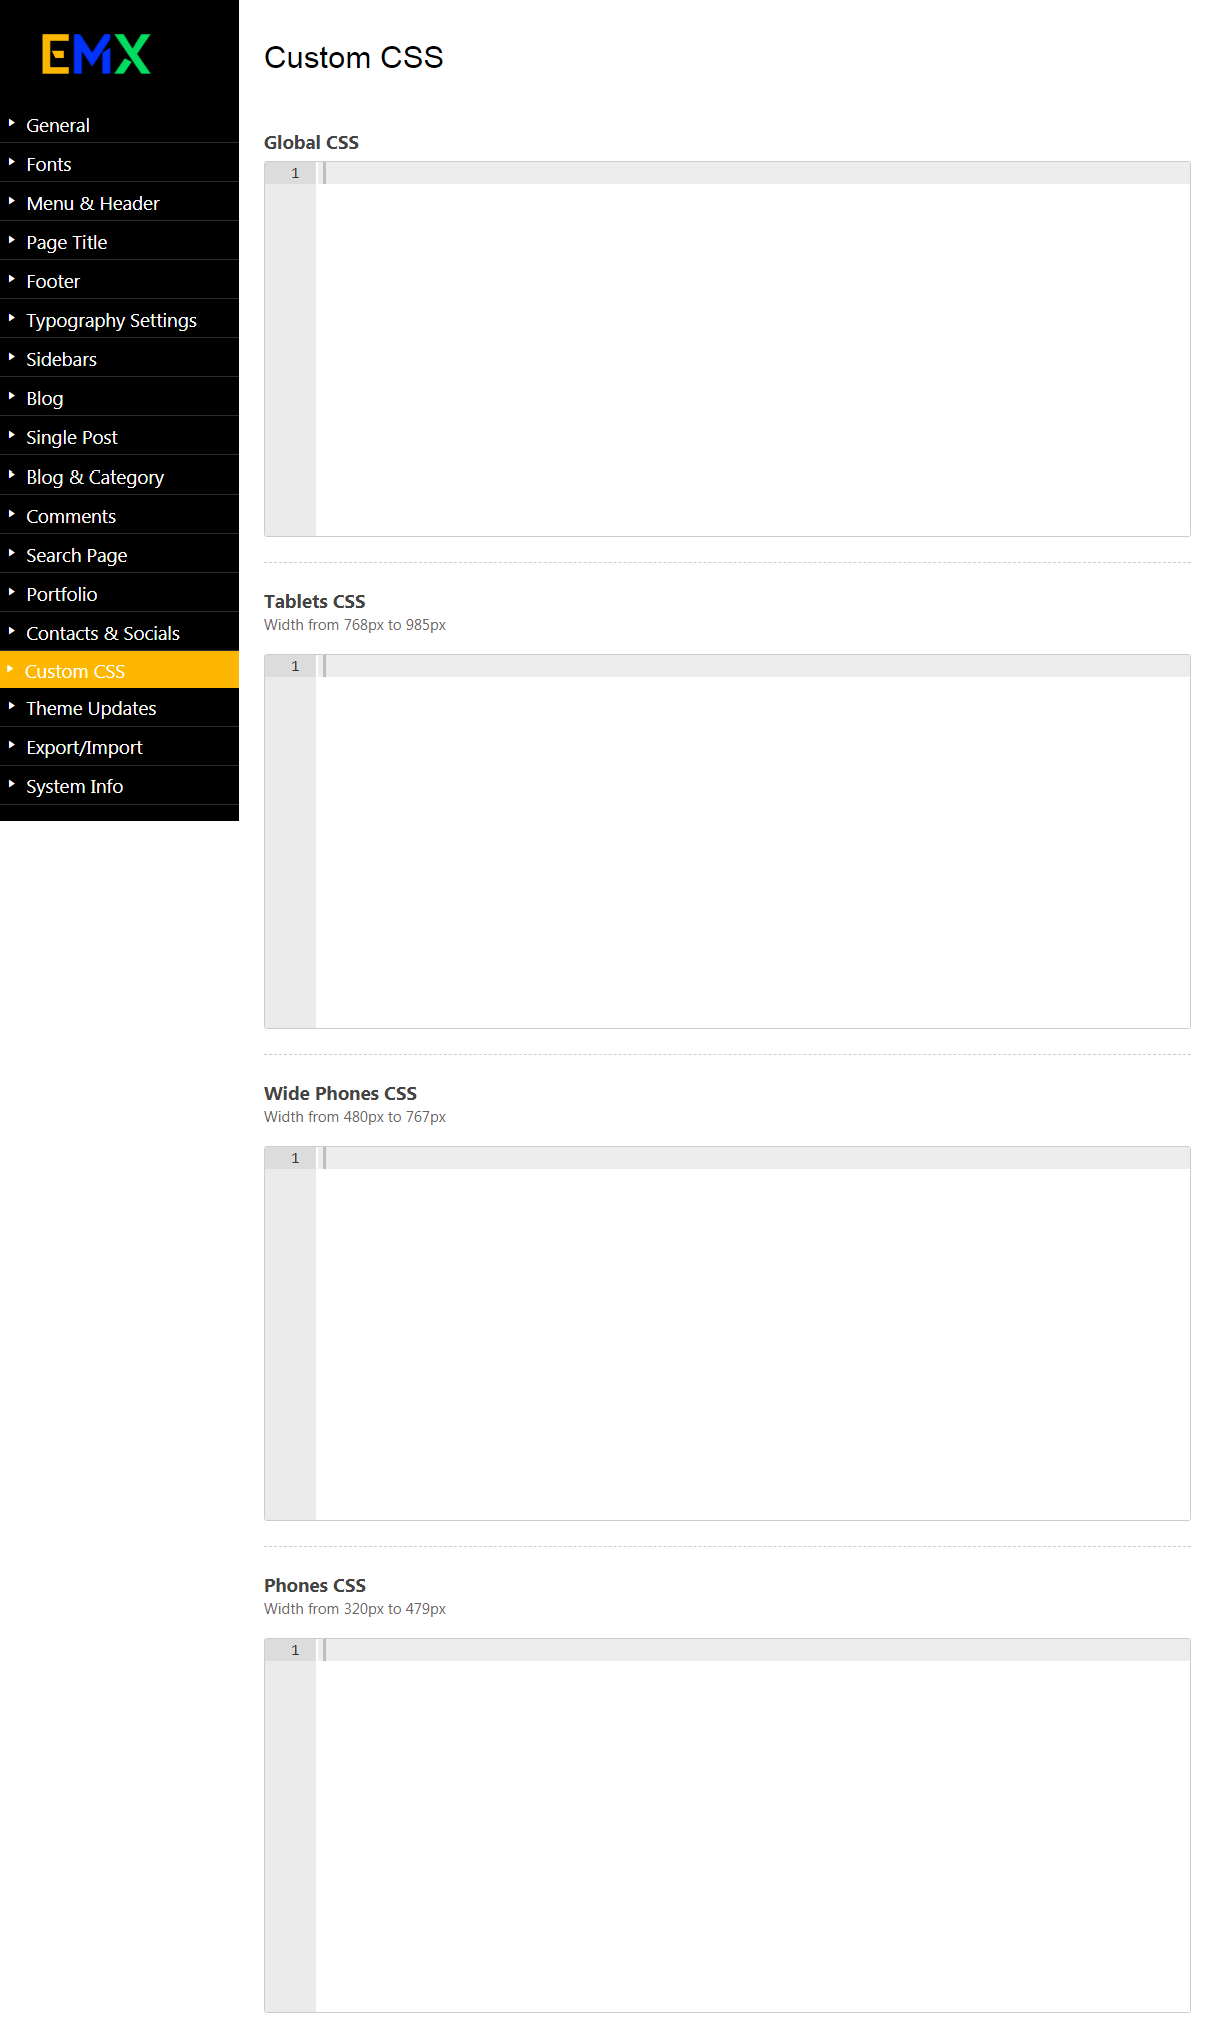
- Navigate to Appearance > Theme Options > Custom CSS
- Global CSS:Insert your desire css (style) to apply to 985px min width.
- Tablets CSS:Insert your desire css (style) to apply to Width from 768px to 985px.
- Wide Phones CSS:Insert your desire css (style) to apply to Width from 480px to 767px.
- Phones CSS:Insert your desire css (style) to apply to Width from 320px to 479px.
4. Page Options
- Sidebar Position - Set the position of the sidebar. This will be applied on The existing page.
- Slider Type - Select the Type of Slider which will be applied on The existing page before the content area.
- Page Content Top & Bottom Spacing -Change the Content top and bottom spacing if you need, the default value of this option is 25px on top and 25px on bottom.
- Display Title - Turn The page title on or off, you can choose the style of page title from Theme options > Page Title Options.
- Page Title Bar Background -Select page title bar background image or color.
- Page Title Bar Background (Retina Version @2x) - Add retina version of page title bar image background.
- Parallax Page Title Bar Background - If you added image background for the page title bar you can turn parallax on or off.
5. Portfolio
To create a new portfolio item, go to:
- Portfolio > Add New from the admin panel.
- Enter a title for your portfolio item in the text field near the top.
- Next, let's categorize this item. At the right side of your screen, in the section called Portfolio Categories, select the categories that you wish to add this item to. Alternatively, if you'd like to create a new category, click on "+ Add New Portfolio Category." A text field will unfold where you can enter a name for the category.
- Then click on "Add New Portfolio Category".
- Once you've checked the categories where you want this item to go to, click the "Publish" button.
Under the Portfolio Categories section are the Attributes, Featured Image, and Portfolio Tags sections. In Attributes, you can type in the order in which you'd like this portfolio item to appear in portfolio lists. In Featured Image, you can upload an image to be displayed for this item on portfolio lists. And in Portfolio Tags, you can enter tags for this item.
Now that you've set up your portfolio item, let's go over the custom fields.